
Please, have in mind that SpyHunter offers a free 7-day Trial version with full functionality. Credit card is required, no charge upfront.
Permanently Delete Files from the Windows Recycle Bin.
To permanently delete files from your computer and recover the space they were using, you need to empty your Recycle Bin. Whenever you try to delete any file in Windows Operating System it goes by default to the so called Recycle Bin. The file will remain in it until you Empty the Recycle Bin or Restore the file.
- What is the Recycle Bin?
- Permanently Delete Files from the Recycle Bin
- How can I Recover Files from the Recycle Bin?
- How can I Recover Permanently Deleted Recycle Bin Files?
- Permanently Delete Files from Your System
- Change the Look of the Recycle Bin
- Show or Hide the Recycle Bin Icon on the Desktop
- Recycle Bin Issues and Limitations
What is the Recycle Bin?
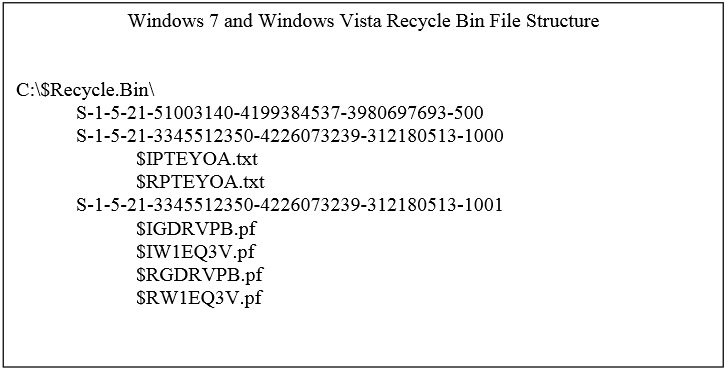
The Recycle Bin[1] is simply a folder with a special designation and permissions. When you actually delete a file in Windows OS, by default, it is not permanently removed[2] from your hard drive, but “moved” to this special folder. The default Recycle Bin designation for a Windows Operating System is to move deleted files to this place. Windows names it \Recycler\%SID%\, where %SID% is the Security Identifier of the currently logged on user. Every singe user logged on will have such a folder created whenever the first time that the Recycle Bin is used. For each user Windows will also create a hidden file called INFO2, – its sole purpose will be to log the deleted file(s) or folder(s) original location, the information will also include file size and deletion time. This is how Windows knows which deleted files belong to which relevant user.
It is possible to bypass the Recycle Bin by configuring to remove the files immediately or if the logged on user holds down the SHIFT key and then pressing the DEL key, the deleted files will not moved to the special folder. Files deleted through Command Prompt, Floppy drives, USB sticks, Network Drives, or Compressed Folders will not go to the Recycle Bin[3]. It can be said that any files or folders that were deleted and sent to the Recycle Bin were most likely the result of a user initiated action.
When you empty the Recycle Bin, Windows actually deletes the INFO2 file for the current logged on user as well as the file(s) or folder(s) it references. If for some reason you want to revert this you can try to recover the INFO2 file by conducting a search for its file header[4].
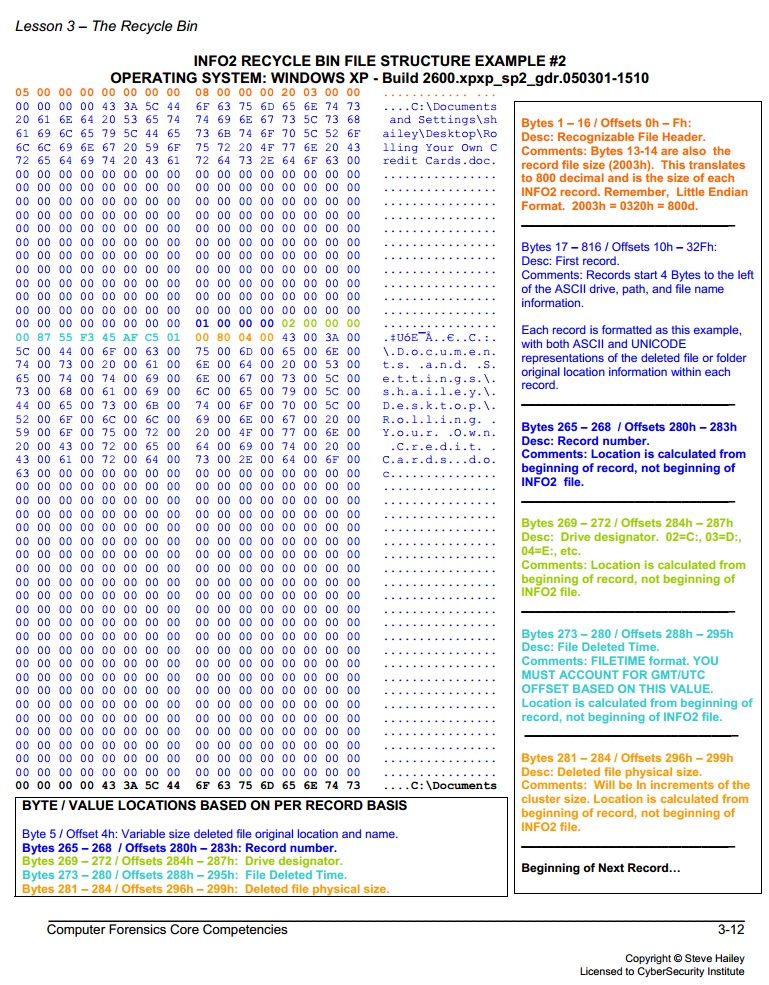
When a file is being sent to the Recycle Bin, the following naming convention[5] is used:
D%DriveLetter%_%IndexNumber%_%FileExtension%.
D%DriveLetter%:
Where The “D” stand for Drive. %DriveLetter% is the drive that the file resided on. Each drive will have it’s own INFO2 file for every single user.
%IndexNumber%:
This number is storing information about the order of deletion. The highest number means that the file was deleted last. When you empty the Recycle Bin and restart the system, the index numbering starts again.
%FileExtension%:
This stands for the original file extension of the file. If a folder is deleted, there will be no extension.
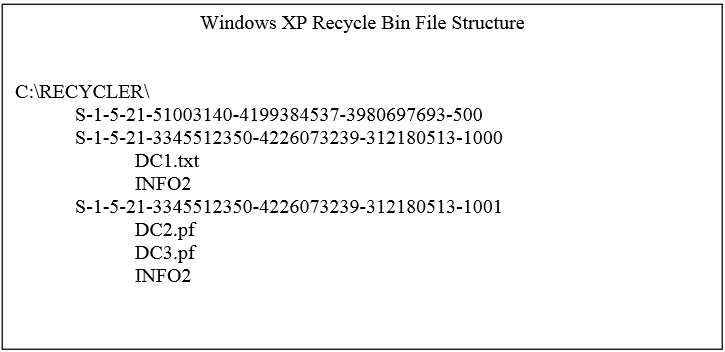
For example if a file named invoice.doc is deleted from the D: drive and is sent to the Recycle Bin. The file will be named Dd1.doc. The entry for this file can be found in the D:\\Recycler\%SID%\INFO2 file for the user who deleted the item from the D: drive.
Permanently Delete Files from the Recycle Bin[6]
In order to remove files from your computer and release hard disk space you need to empty your recycle bin. You can remove individual files or folders or empty the entire Recycle Bin at once.
In order to remove individual entries you should double click on the icon of your recycle bin. Then select the desired file or folder and right click on it. Select delete.
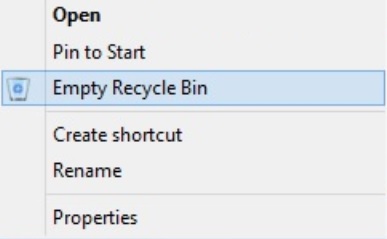
In order to remove everything that is stored in the recycle bin, you need to select it. Right Click on it and then select Empty Recycle Bin.
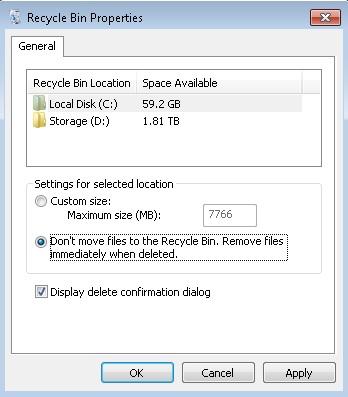
you can also set the files to automatically bypass the recycle bin[7] by checking “don’t move files to the Recycle Bin. Remove files immediately when deleted.” in the Recycle Bin Properties.
How can I Recover Files from the Recycle Bin?[8]
In order to recover files from your recycle bin. You need to double click on it. Then select the file or files you want to recover.
In order to remove individual entries you should double click on the icon of your recycle bin. Then select the desired file or folder and right click on it. Select delete.
In order to remove everything that is stored in the recycle bin, you need to select it. Right Click on it and then select Empty Recycle Bin.
How can I Recover Permanently Deleted Recycle Bin Files?
You might accidentally delete a file that you should not delete. Don’t panic, there is quite a good chance to recover the file, however the more you use the computer the less that chance becomes. There are numerous free recovery programs that you can use to recover Permanently deleted Recycle bin files. Here is a short list: Recuva Free, Undelete 360, MiniTool Partition Recovery, Wise Data Recovery, PhotoRec, FreeUndelete, Paragon Rescue Kit Free, Glary Undelete, Pandora Recovery, PC Inspector File Recovery, etc…[9]
Permanently Delete Files from Your System
Here are a few methods that you can use to Permanently Delete sensitive Data from your Hard Drive: Low Level Formatting or using the following software: Darik’s Boot and Nuke, CCleaner, Eraser, even Microsoft provides a command-line tool[10] that can do this job.
Change the Look of the Recycle Bin
- Click on the Windows Start Button
- In the search box type “control”, you should see the control panel at the top of the list,
- go to appearance and Personalization and then click on Personalization.
- Click Change Desktop icons.
- In the list of desktop icons, click Recycle Bin (full) or Recycle Bin (empty), and then do one of the following:
- To change the Recycle Bin to a new icon, click Change Icon. Select an icon from the list, and then click OK.
- To change the Recycle Bin to its original icon, click Restore Default.
Show or Hide the Recycle Bin Icon on the Desktop
- Click on the Windows Start Button
- In the search box type “desktop icons”, you should see the “Show or hide common icons on the desktop” – click on it
- In the Desktop Icon Settings dialog box, do one of the following:
- To hide the Recycle Bin, clear the Recycle Bin check box.
- To show the Recycle Bin, select the Recycle Bin check box.
- Click OK.
Recycle Bin Issues and Limitations
The Recycle Bin might be an ingenious and simple piece of software – but it has its limitations. One of them is that the Recycle Bin does not catch every file you delete. Any files deleted from command prompt, USB sticks floppy drives or compressed folders will NOT go to the recycle bin
Another thing is that, the Recycle Bin size is usually set to 10% of your hard drive, however there is a limitation of 3.99GB in Windows XP, regardless of your HDD capacity. “The 4GB limitation is hard coded and there is no way to increasing the recycle bin beyond that capacity” – states Martin G Evans, CISCO Certified Microsoft Partner[11] and this is because of the 32 bit processing. Actually 2^32 bytes is exactly 3.99 GB, however, Operating Systems including Windows Vista and later does not have this problem.
If you want to stick with Windows XP, you should establish some kind of procedure, so that you make sure you check huge archives before deleting any files.
References:
[1]http://www.computerhope.com/jargon/r/recycbin.htm
[2]http://www.deletefilespermanently.com/help/Using/EmptyWipeRecycleBin.html
[3]http://www.computerhope.com/issues/ch001009.htm
[4]/wp-content/uploads/2014/04/INFO2.pdf
[5]http://www.csee.umbc.edu/courses/undergraduate/FYS102D/Recycle.Bin.Forensics.for.Windows7.and.Windows.Vista.pdf
[6]http://windows.microsoft.com/en-us/windows/permanently-delete-files-recycle-bin#1TC=windows-7
[7]http://www.sevenforums.com/tutorials/12205-recycle-bin-permanently-delete-items-automatically.html
[8]http://windows.microsoft.com/en-us/windows/recover-files-recycle-bin#1TC=windows-7
[9]http://www.techradar.com/news/software/applications/best-free-recovery-software-1141256/2#articleContent
[10]http://technet.microsoft.com/en-us/sysinternals/bb897443.aspx
[11]https://web.archive.org/web/20140528015334/http://social.technet.microsoft.com/profile/martin%20g%20evans/?ws=usercard-mini

Searching out for an ideal way to shred the files completely, then Kernel File Shredder is one such application that you can rely on. By making a proper utilization of this file shredder, you can effectively remove files from your system hard drive permanently. The software make data of file useless, rename it, and then shreds it from the hard disk of system. In addition, the software is smartly programmed and competent enough to shred all kinds of files and folders including Excel Sheets, JPEG files, Presentation files etc. To evaluate the feature of software you can download its trial version at free of cost.